

How to DIY Your Video Gamers Room: 10 More Creative Projects to Build the Setup of Your Dreams

The best gaming rooms in 2026 aren’t bought — they’re built. There’s a particular satisfaction that comes from a setup where every piece has a story, where you can point to a wall and say “I made that” rather than “I clicked add to cart.” And the truth is that some of the most stunning gaming rooms on TikTok and Reddit right now were assembled by people who’d never touched a saw before they started — with materials from Home Depot, IKEA, and Amazon, plus a bit of YouTube education.
Below are 10 fresh DIY gaming room projects worth tackling in 2026 — completely different from the obvious pegboards and floating shelves you’ve seen everywhere. These projects range from beginner-friendly weekend builds to more ambitious multi-weekend projects, all designed to add genuine character, function, or wow-factor to your setup. Pick the ones that match your space, your skill level, and your style. Tackle them one at a time, and six months from now you’ll have a gaming room nobody else has — because nobody else built it.
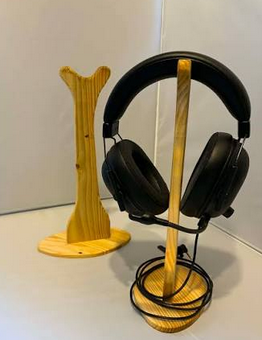
1. Build a Custom Headphone Stand from Wood Scrap (Beginner)
Skill level: Beginner | Time: 2-3 hours | Cost: $15-30
A premium leather headphone stand costs $50-100. A DIY one carved from a small wood block costs almost nothing and looks twice as expensive. Grab a piece of hardwood scrap from a lumber yard (oak, walnut, or even rejected cutting board offcuts), draw your design — a simple curved arm rising from a base, or a more elaborate bust shape — and cut it with a coping saw, jigsaw, or even by hand.
Sand it smooth, stain or oil it for finish, and you’ve got a unique headphone display piece that looks like something from a high-end audio store. The 2026 trend is sculptural curved designs that hold the headphones at a 45-degree forward angle. Add a small recess or hook for your DAC/amp if you have one.
Get hardwood blanks and stain: Check hardwood project blanks on Amazon →
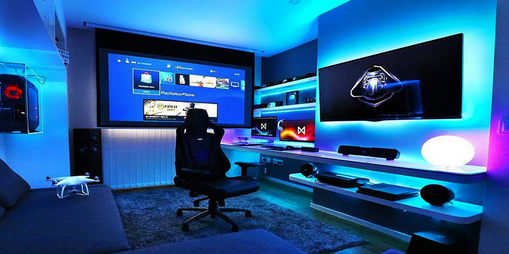
2. Create a DIY Bias Lighting Strip (Beginner)
Skill level: Beginner | Time: 45 minutes | Cost: $25-40
Bias lighting is the soft glow behind your monitor that reduces eye strain during long gaming sessions and gives your setup that “premium studio” look. The DIY version costs a fraction of branded options like Govee or Phillips Hue: a 5-meter USB-powered LED strip with adhesive backing, cut to match the back of your monitor, plugged into the monitor’s USB port.
The strip turns on and off with your monitor automatically. For higher quality, look for strips with a 90+ CRI (color rendering index) rating, which produces accurate white light that doesn’t distort your perception of on-screen colors. Stick the strip about an inch from the edge all the way around the back of the monitor. Around $25-40 total. Genuinely one of the highest-impact ten-dollar upgrades in gaming setups.
Get a USB bias lighting strip: Check USB bias lighting on Amazon →
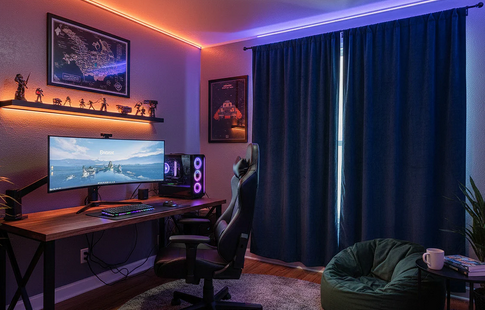
3. Build a Sliding Monitor Privacy Curtain (Intermediate)
Skill level: Intermediate | Time: 3-4 hours | Cost: $40-80
A weird but brilliant DIY for shared spaces, streamers wanting clean transitions, or anyone who wants their gaming setup to disappear when not in use. Install a small curtain rod or sliding track above your monitor wall, and hang a decorative fabric panel that slides across to hide your entire setup when you’re not gaming.
It can double as a green screen for streaming (pick chroma key green fabric) or a blackout backdrop (deep velvet for that cinematic look). For minimalist apartments or living rooms where the gaming setup needs to “go away” for non-gaming activities, this is the most elegant solution available. Install hardware to match your room’s existing color palette so it disappears into the decor.
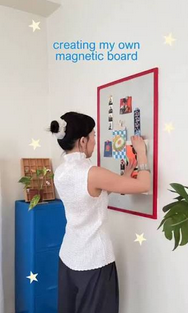
4. Make a Magnetic Whiteboard or Cork Strategy Wall (Beginner)
Skill level: Beginner | Time: 2 hours | Cost: $30-70
For gamers who play strategy games, MMOs, complex RPGs, or build content, a dedicated planning wall is a game-changer. Frame a large piece of magnetic whiteboard, cork sheeting, or even chalkboard paint applied directly to a wall section, and you’ve got a permanent space for raid notes, build orders, character planning, content storyboards, or just to-do lists during marathon sessions.
For Magic: The Gathering, Warhammer, or TTRPG players, a corkboard wall lets you pin reference art, lore notes, and campaign maps. Frame it nicely (wood molding around the edges takes it from “kid’s room” to “creator’s workshop”) and it becomes both functional and decorative. Around $30-70 depending on size.
5. Build a Wall-Mounted Controller and Headphone Shelf (Intermediate)
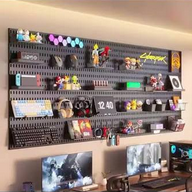
Skill level: Intermediate | Time: 3-4 hours | Cost: $35-80
A single dedicated wall shelf for controllers and headphones — different from a floating display — gets your gear off your desk while keeping it accessible. The design that’s trending in 2026: a long horizontal wood plank mounted to the wall with under-mounted hooks for headphones and controller cradles cut from a second piece of wood.
Cut, sand, and stain the main plank. Cut small controller cradles (basic L-shaped supports) and glue or screw them under the main shelf. Add hooks for headphones at the ends. The result is a museum-style horizontal display that holds 2-3 controllers and 1-2 headsets in clean lines. Mount it at eye level above or beside your desk.
6. Create a Hidden Cable Management Box (Beginner)
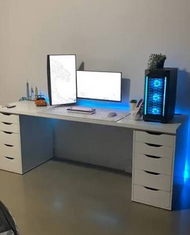
Skill level: Beginner | Time: 2-3 hours | Cost: $25-50
Power strips and cable bricks look terrible, even with the best cable management. A custom cable box that hides them entirely is the fix. Buy a wood storage box (or build one from cheap pine), drill cable pass-through holes in the back, and use it to hide the power strip, chargers, and excess cable slack underneath or behind your desk.
For a premium look, paint or stain it to match your desk, and add adhesive vent slots on the sides for heat dissipation. The 2026 trend goes further: build a slim hidden compartment that mounts directly to the underside of your desk, so the entire mess disappears completely from view. Around $25-50 depending on materials.
Get cable box materials: Check cable management boxes on Amazon →
7. Build a Vertical Hanging Plant Display (Beginner-Intermediate)
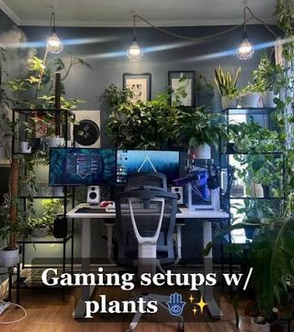
Skill level: Beginner-intermediate | Time: 2-3 hours | Cost: $40-100
Plants soften the hard tech surfaces in a gaming room better than anything else — but most gaming setups have terrible floor space. The fix: a vertical hanging plant display. Install a wood plank or wire grid on a wall, attach small hooks at varying heights, and hang trailing plants (pothos, philodendron, string of pearls) in macramé hangers or small pots.
The 2026 alternative for low-light gaming rooms: use high-quality faux plants from Etsy or West Elm, which are now genuinely hard to tell from real ones in photos and don’t require any care. Pair real plants with grow lights (which double as ambient gaming lighting) for an even more lush effect. Around $40-100 depending on number of plants.
8. Make a DIY Gaming-Themed Wall Mural or Stencil (Intermediate)
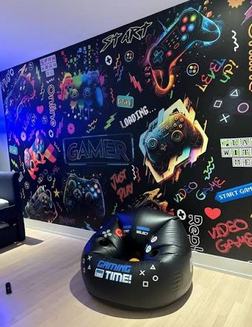
Skill level: Intermediate | Time: 4-6 hours | Cost: $35-80
A wall mural transforms a gaming room from “decorated” to “designed” — but commissioned art costs hundreds. The DIY approach: create a stencil from cardboard or vinyl, tape it to your accent wall, and paint your design directly onto the wall. Pixel art designs work brilliantly for stencils because the geometric shapes are easy to cut and align.
Popular 2026 mural ideas: a giant pixel-art controller, a minimalist game logo, a topographic Hyrule map outline, geometric Triforce, or your gamertag in graffiti style. Use painter’s tape liberally to keep edges sharp. Practice on cardboard first. The result is a focal wall that costs $35-80 in paint and stencils but looks like a $500 commissioned piece.
Get wall paint and stencil materials: Check wall stencil kits on Amazon →
9. Build a DIY Monitor Riser with Hidden Storage (Intermediate)
Skill level: Intermediate | Time: 3-4 hours | Cost: $40-90
A monitor riser lifts your screen to ergonomic eye level and frees up the space underneath for storage or keyboard parking. Premium ones cost $80-150. The DIY version uses a wood top plank (cut from oak, walnut, or stained pine) mounted on two short wood blocks or hairpin legs.
For a smarter version, build it as a small box with a drawer or open shelf underneath — perfect for hiding controllers, keyboard, or small accessories when not in use. Add a small LED strip underneath for ambient under-glow that lights your desk surface. The look is genuinely premium and matches whatever existing wood tones you have in the room. Around $40-90 depending on materials.
10. Create a Backlit Gaming-Themed Display Cabinet (Advanced)
Skill level: Advanced | Time: 1-2 weekends | Cost: $100-250
The ambitious DIY that becomes the centerpiece of an entire gaming room. Build (or convert an IKEA DETOLF or BILLY) a glass-front display cabinet, install LED strip lighting inside the back panel, and use it to showcase your most prized collectibles — limited edition figures, retro consoles, sealed game boxes, signed memorabilia.
The 2026 design trend: a cabinet with cascading shelves lit from above, each item illuminated like a museum exhibit. Hide the LED controller behind the cabinet and use a smart plug so the lights respond to voice commands or schedules. For maximum impact, paint the cabinet’s interior back panel a deep contrasting color (matte black, deep emerald, or navy) that makes lit items pop. Around $100-250 depending on cabinet choice and lighting quality.
Get LED lighting and cabinet materials: Check display cabinets on Amazon →
How to Approach DIY Gaming Room Projects in 2026
Three guidelines that turn DIY ambition into actual finished projects. Start with the project that solves your biggest current frustration. If your desk is a cable jungle, build the hidden cable box first. If your collection has nowhere to live, the display cabinet wins. If your room feels cold and clinical, the plant display or wall mural transforms it instantly. Match the project to the problem, not to whatever looks coolest on Pinterest.
Buy your tools before your materials. Most DIY guides ignore this, but trying to start a project without the right drill bit, clamp, or staple gun creates instant frustration that kills momentum. Invest $100-150 in a basic DIY toolkit (cordless drill, jigsaw, sander, clamps, level, stud finder, paintbrushes) before your first project. You’ll use those tools forever, on every future project, and on home repairs you didn’t expect to need.
And don’t be afraid of imperfection. The “handmade by you” look is part of the charm. A slightly uneven floating shelf or hand-stenciled mural has more character than mass-produced perfection. Your gaming room is for you to enjoy — not to win Architectural Digest awards.
Final Summary: Build the Gaming Room Nobody Else Has in 2026
A DIY gaming room isn’t about saving money — it’s about creating something genuinely yours. Build a custom wood headphone stand. Add bias lighting behind your monitor. Install a sliding privacy curtain if you share your space. Make a strategy wall for planning. Build a wall-mounted gear display. Hide your cables in a custom box. Soften the room with vertical plants. Paint a mural or stencil for a focal wall. Build a monitor riser with hidden storage. And cap it all off with a backlit display cabinet for your most prized items. Tackle even three or four of these, and your gaming room will feel completely transformed.
The other lesson DIY culture keeps proving is that the best gaming rooms come together over months, not weekends. One project at a time, one detail at a time, your space evolves into something with personality, character, and stories. Start with the project that addresses your biggest current frustration this weekend. Then another the next month. Then another. A year from now, you’ll have a gaming room nobody else has — and one you built with your own hands. There’s no feeling quite like it.